Joint aggregate
The joint aggregate is an important component of Permeable Interlocking Concrete Pavement (PICP) installations, as it allows for water falling on the surface to infiltrate into the underlying layers (bedding and filter layer, base course, and sub-base reservoir).
Construction Steps:
- Ensure paver pattern and joint width match drawing details.
- Fill in the openings and joints with ASTM No. 8 stone ( mm)* using tools such as a brush or a broom.
- Sweep the pavers to remove excess aggregate on the surface.
- Apply additional aggregate to the openings and joints, filling them completely.
- Repeat steps 4-5 until the joint gap has been filled completely.
Note: Some paver joint widths may be narrow and not accept most of the ASTM No. 8 stone - (Interlocking Concrete Pavement Magazine, 2007)[1]. Instead, use material that will fill the joints such as washed ASTM No. 9( mm) or No. 10 (mm) stone.
Key Inspection Points:
- Material arrival: Ensure that material meets specifications and is free of debris and fines.
- Material installation: Ensure that material is being placed with proper equipment (brush/broom).
Mistakes to Avoid:
- Accept material that does not meets design specifications.
- Accept material that contains fines or debris.
- Do not tamp vibrate material into joint
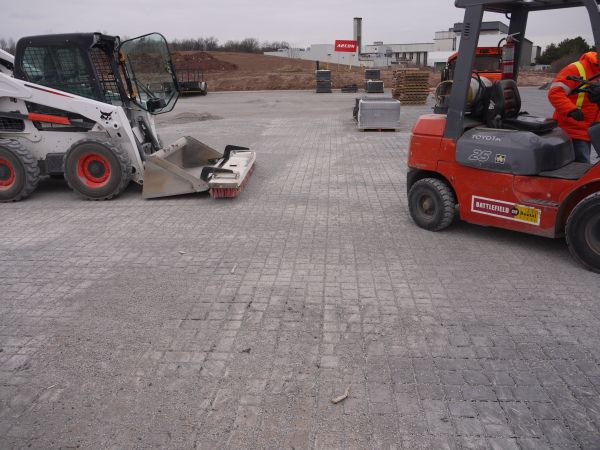
Joint material being swept with a brush to fill in the joint space.
(Photo source: CVC)
Final appearance of the joint material in the permeable interlocking concrete pavement system.
(Photo source: CVC)


- ↑ Interlocking Concrete Pavement Magazine. 2017. Contractor Focus: Construction of Bases for Permeable Interlocking Concrete Pavements - Part I. Edition August 2007. https://www.angeluspavingstones.com/wp-content/uploads/2012/11/07_Aug_Contractor_Focus.pdf