Excavation and grading
The construction guidance in this section applies to all sub-surface and ground-level LID practices: bioretention gardens, bioswales, rain gardens, exfiltration trenches, enhanced swales, permeable pavements, infiltration trenches, infiltration chambers, and soakaways.
Overview[edit]
This section gives guidance for project managers, engineers, and contractors on the excavation and grading steps required for successful construction of sub-surface and ground-level LID practices.
Clearing and grubbing[edit]
Clearing and grubbing is the stripping of vegetation and topsoil prior to excavation and rough grading within designated areas.
Construction steps
- Clear trees, large shrubs, stumps, etc. (grubbing).
- Use appropriately sized machinery (e.g. a mini-excavator) to strip sod and ground-level vegetation (clearing).
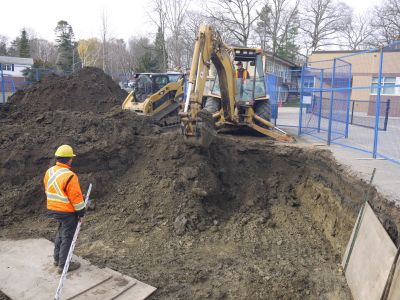
- Stockpile materials within designated areas if necessary. If the materials are being hauled offsite, stripped materials ideally would go straight into the back of a dump truck.
- Secure stockpiles with appropriate erosion and sediment control (ESC) measures if the material must be stored before hauling offsite or will be reused.
Key inspection points
- Structural ESC measures are in place before clearing and grubbing begin.
- Natural heritage features, including trees, and construction limits are clearly marked and respected by the contractor.
- Contractor cleared and grubbed only within designated areas and according to the phasing plan.
Mistakes to avoid
- clearing more area than is needed
- insufficient marking of areas to be protected
- stockpiling materials without ESC controls or for extended periods of time
- leaving heavy equipment in the facility’s footprint
- making excessive passes with heavy equipment in the LID practice’s footprint without scouring soil afterward
Excavation and rough grade[edit]
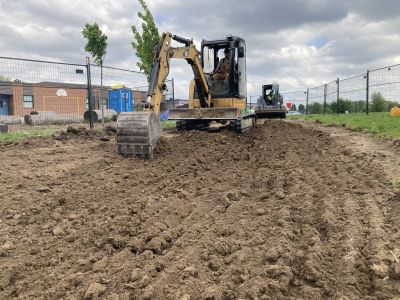
Excavation to the specified depths in the drawings is critical to the LID feature’s future performance. It also requires heavy machinery which, if used incorrectly, can compact soils and lower their native infiltration rates. Over compaction of native soil underlying LID practices that infiltrate stormwater has been shown to negatively affect their drainage function. To limit soil compaction the location of infiltration practices should be well-marked and surrounded by perimeter controls to protect the area from heavy equipment and vehicle traffic during site construction. Excavation should be performed by a low ground pressure tracked excavator that is kept outside the footprint of the infiltration facility and should not be performed when soils are saturated. If over-compaction does occur, it can be alleviated by soil fracturing (i.e., scooping and re-depositing native soils at the base of the practice), tilling with a subsoiler or rototiller, or raking using a toothed excavator bucket.
Construction steps
- Mark out the limit of excavation.
- Use predefined access routes to move heavy equipment.
- Cut and stabilize access and staging areas.
- Cut and stabilize channels and slopes.
- Excavate the LID feature from the outside-in whenever possible. A standard excavator (10-45 tons) has a longer reach than mini (<6 tons) or midi excavators (6-10 tons) and can be the best choice despite its weight, since it may not need to enter into the facility’s footprint to complete the job. However, a mini excavator would be the best choice if entry into the LID feature’s footprint is necessary.
- Excavate to within 100 mm of the final grade.
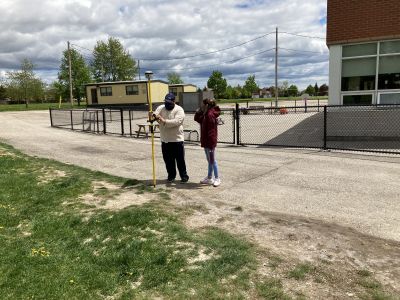
- Check grades with appropriate equipment (transit levels, etc.).
- Stockpile materials in a designated area if it must be stored before hauling.
Key inspection points:
- Confirm the limit of excavation.
- Use of excavation equipment specified in the contract, in the required manner (from the outside in, with a mini excavator, etc.).
- Confirm excavated rough grade and final grade prior to backfilling using survey equipment.
- Use of a toothed excavator bucket to rake the bottom of infiltration practices and reduce soil smearing where applicable (does not apply to load bearing practices like permeable pavements or stormwater tree trenches).
- If appropriate, measure compaction using a soil cone penetrometer.
- If appropriate, field verify infiltration rates at excavated bottom of practice using Guelph permeameter or double ring infiltrometer.
Mistakes to avoid:
- Making too many passes with heavy machinery within the LID footprint.
- Leaving heavy machinery within the LID’s footprint (for breaks, lunch, overnight, etc.).
- Using the wrong equipment.
- Over excavating.
- Smearing the bottom of the practice with the bucket, which can compact native soils.
Final excavated grade and verification[edit]
LID designs typically have specific grading requirements. Verifying depths and slopes is critical for the optimal performance of the facility. For example, if the design calls for a channel with a 1% slope, the channel may not function as designed if it has a 2% slope instead.
Excavation to the sub-grade will differ depending on whether the design is for a full infiltration, partial infiltration, or no infiltration LID system. If it’s a full infiltration or partial infiltration practice, the sub-grade should be as level as possible to promote even infiltration across the facility’s footprint. For no infiltration designs, excavate sub-grade slopes to the design grade in the direction of the underdrain, typically 1 to 2%.
As with all infiltrating LID practices, avoid compaction of sub-grade soils whenever possible. However, depending on the design and the local municipality, compaction of the sub-grade may be required for permeable pavement LIDs.
Construction steps
- Excavate the final 100 mm, to the final design grade, using appropriate equipment. This is often done with hand tools.
- Confirm excavation depths and slopes using appropriate equipment (transit levels, global navigation satellite systems, etc.)
Key inspection points
- Confirm final excavated depths and slopes.
Mistakes to avoid
- “Eye-balling” depths and slopes


